Before creating a case, be sure that you have an account and are logged in, and that you have previously sent studies to the DICOM queue or have some images ready to be uploaded (see Getting Images into the Teaching File Server).
To create a new case, click Create — New Case in the main menus.
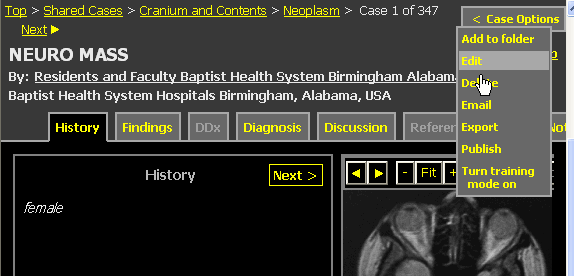
To edit an existing case, navigate to the case and choose “Edit” from the Case Options dropdown menu:

Creating a new case or editing an existing case will launch the Case Editor. The Editor may take several seconds to load, during which time you’ll be instructed to wait. If you do not have JavaScript enabled or are using a web browser that does not support it then you will be shown a simplified version of the Case Editor.
The editor consists of five tabs: Case Properties, Case Text, Case Images, File Upload, and DICOM. Some of the tabs may take several seconds to load. You can start entering Case Properties as soon as the first tab is loaded; you don’t have to wait for all the tabs to finish loading. Once the other tabs are loaded, you can visit them by clicking on the tab labels. There is no prescribed order for entering case information; feel free to jump back and forth between the tabs at will.
Next: Entering Case Properties