The Non-Javascript Editor is an easily fillable web form. Be sure that you have an account and are logged in , and that you have some images ready for uploading .
-
After clicking on "
Create New Case
"
from the Case Manager the Non-Javascript Editor will load in your
browser. The form consists of structured fields for entering case
text and metadata.
You can fill out as much of the case form as you like, and come back later to complete it. Case fields are optional unless they are marked with a red asterix ( * ). Your administrator determines whether each field is optional, required, or disabled. Disabled fields will not appear in the case editor.
-
Enter a
descriptive title.
The title will appear
at the top of the case and in the case abstract when training mode
is not turned on. It is OK to mention the diagnosis in the title --
you won't be giving away the answer because the title will be hidden
when users are
viewing the case
as an unknown
.

-
Use the drop down menus to specify access control settings. Set Readable By to "Owner Only" if you want the case to be private. Set it to "All Users" if you want to share it with the public. If you belong to any groups, you can also specify group-level sharing.

Set Writable By to "Owner Only" if you do not want other users to be able to edit your case. Alternatively, you can specify that the case is writable by members of a group you belong to. If the Writable By field does not show up, it means you do not belong to any groups. See Managing Groups for more information.
-
Enter
patient information.
If your system allows
patient identifiers, you may be prompted to enter a name and patient
number, which are useful for performing followup studies. To protect
patient privacy, the patient name and number will be hidden from users
other than the case author and administrator. Whenever someone visits
the case, the system will keep a log of whether or not the patient
information has been displayed. You may also be prompted for demographic
information such as the age and gender.

-
You may enter additional information about the case, including the
exam date, modalities, pathology, anatomy, keywords,
and
ACR codes
. Your case will be classified according to the
values you select using the dropdown menus for pathology and anatomy.
The more information you fill out, the easier it will be for users
to find your case using the
Advanced Search
form.

-
The owner and author of a case are now separated. A case can also have mulitple owners and authors. To add or remove owners and authors click
edit
to bring up a list of users.

-
Enter case text, including
history, findings, diagnosis,
discussion,
and
references
if available.
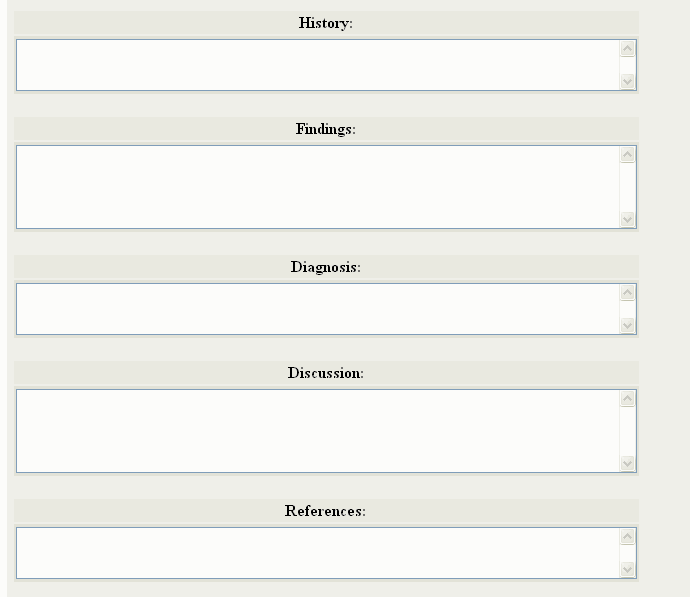
If you prefer, you can report findings in the image captions instead of in the general findings field (see: Adding Images to a Case ). All the case text will be indexed by the database search engine. The various fields will be revealed incrementally when your case is viewed with training mode turned on.
-
Optionally, you may enter
private notes
. This field
will be hidden from other users. This field is searchable by you,
so you can use it to add special tags or keywords for your own personal
filing system.

-
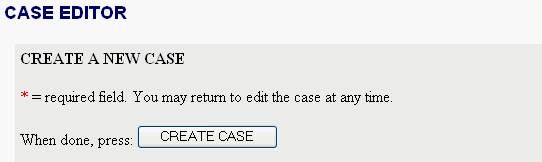
When you are ready to submit the case, click the
CREATE
CASE
button at the top or the bottom of the form. The case
will be added to the database, and a unique case ID will be assigned
to the new case. You will see a summary of the case you've created.
If you chose to share the case, it will be immediately available for
browsing and searching.
-
Before adding images to a case, you need to have those images saved
as files on your hard drive and ready to upload. This may involve
exporting images from your PACS, taking a screen capture, or emailing
the images to yourself. Images can be in any common format, such as
JPEG, GIF, PNG, PSD, TIFF, Bitmap, or DICOM. Please see
Preparing
Images
for more information.
To add images to a case:
-
Access the
Add Images
form as follows:
- Always: the image will appear regardless of what stage of training mode the user is in. This is the most common setting.
- Always except during "View as Unknown": the image will be omitted during the first stage of training mode. This is useful for images that explicitly reveal findings, such as close-ups or images marked with graphical annotations (e.g. arrows pointing out findings).
- Only during "View as Unknown": the image will only appear during the first stage of training mode. If you have two copies of an image (one that is marked up with graphical annotations), you can use this setting to have annotations effectively turn on or off as the user switches between stages of training mode. Upload the two images in adjacent positions, then set the annotated image to display "Always except during View as Unknown" and the non-annotated image to display "Only during View as Unknown".
- Only during "Reveal Findings & Captions": the image only appears during the 2nd stage of training mode.
- Only during "Reveal Full Case": the image only appears during the final stage of training mode.
To add images to a case you just created , click "Add Images to this Case" which appears near the bottom of the screen after you submit the new case form:

To add images to a case you created earlier using the Non-Javascript Editor , navigate to the case, click "Edit" in the case title bar to launch the Case Editor, then click "add images" which appears to the right of the case title: (Go to the File Upload tab if you are using the Tabs-Based Editor )

This will take you to the Add Images form, which allows you to add up to ten images to a case (you can add more at any time):
To specify the location of an image to upload, click the first Browse... button under the Source column, which will launch a Choose file popup:
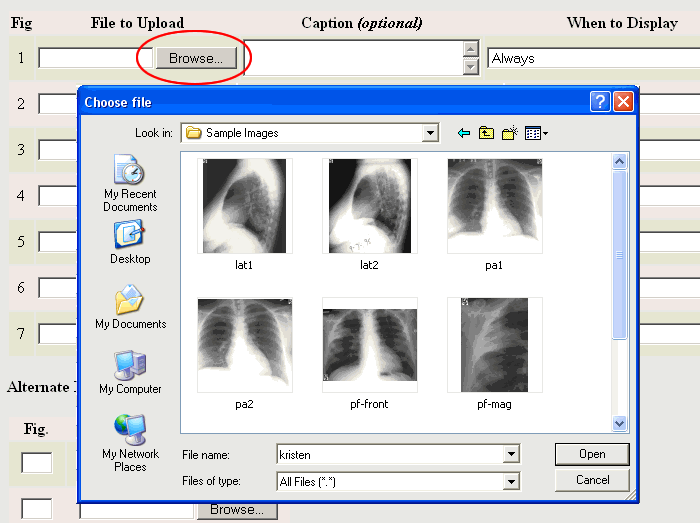
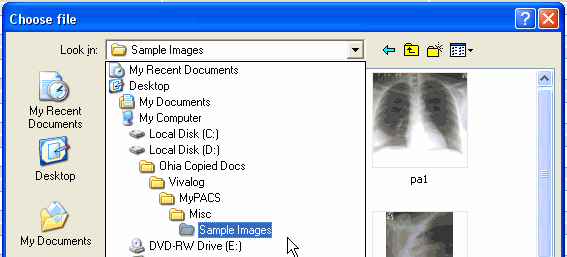
This popup window may look slightly different from the one displayed above, depending on your operating system. You will see either thumbnails or icons representing the files in a folder on your hard drive. To look in a different folder, click the folder name (e.g. "Sample Images" in the example above), and navigate to the desired folder from the drop-down tree menu:
Once you have located the desired file to upload, double-click on the file icon or thumbnail, which will select that file and close the popup window, returning you to the Add Images form.
You may optionally enter a caption for the image. The caption may simply identify the image parameters (e.g. "Axial Pre-Contrast T1"), or you it can include a paragraph describing the findings in the image. The caption will not appear when the user is viewing the case as an unknown during Training Mode , so it is safe to include findings in the caption. You do not need to enter a figure number, as those will be automatically generated.
If you want to control when the image is displayed (the default is Always), specify the criteria using the drop-down menu under "When to Display":
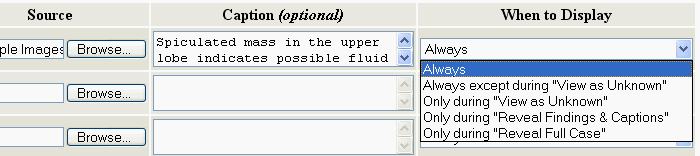
The choices are:

The images are converted into JPEGs and resized for optimal web viewing. You can always retrieve the originally uploaded images by clicking on the "original format" link.
Next: Editing a Case